3 Pro Tips To Make Portraits Pop
In photography, capturing a great image is only half the battle. The post-processing stage is where you truly define the viewer’s experience, directing their eye exactly where you want it to go. While global adjustments (applying edits to the entire photo) are necessary, the real magic happens with precise local adjustments. Adobe Lightroom’s powerful masking tools now make isolating elements simpler and more effective than ever.
This article will walk you through three fundamental masking techniques, demonstrated using a striking snowy owl portrait, designed to separate your subject from the noise and give it that professional "pop."
1. The Background Override: Creating Negative Space Through Contrast
A busy or bright background is the fastest way to dilute the impact of your subject. The eye is naturally drawn to light and contrast; by darkening the background, you create separation and essential negative space. This forces the viewer to focus entirely on the subject.
Using Lightroom's sophisticated AI masking (available under the Masking icon), you can now instantly achieve this. Simply click Select Background or add a linear gradient and subtract the subject.
Darkening and Subduing: With the mask active, lower the Exposure and Highlights sliders for the background area. This can make a distractingly bright or colored wall disappear into shadow, leaving your subject isolated. A slight desaturation on the background can also help prevent warm tones from fighting for attention with your subject. This technique instantly shifts the visual weight of the image, making the main subject the brightest and most complex element.
2. Micro-Contrast Mastering: Subject Brightening and Sharpening
Once you have established separation by darkening the surroundings, the next step is to refine the subject itself. We want the subject to not only be brighter than the background but also rendered with exceptional detail and perceived sharpness. Simply cranking up global sharpness often adds unwanted digital noise; local adjustments offer a far superior result.
To isolate the subject precisely, use Lightroom’s AI to click Select Subject.
Targeted Clarity and Texture: With the subject mask active, gently push the Texture and Clarity sliders. Texture enhances fine details like the feather patterns of the owl, while Clarity boosts mid-tone contrast, giving the subject a 3D feel. A small boost to Sharpness here is much cleaner than a global application.
The Targeted Exposure Bump: Concurrently, you should raise the overall Exposure and Whites just enough to make the subject feel illuminated and luminous. This combined technique makes the subject appear sharper, brighter, and critically, the focal point of the entire composition.
3. The Artificial Glow: Inserting "Vignette Glow" for Creative Focus
The final technique is a masterstroke in creating contrast and dramatic light. Traditional global vignettes often darken the edges, making the image heavy. This method does the opposite: it uses light to build contrast around the subject, pushing it forward. We create an artificial "glow" effect, typically around the periphery of the subject or where light naturally hits it.
The best way to achieve this is by using a Radial Gradient.
Painting with Light: Draw a large, soft radial gradient (with a high Feather setting) positioned slightly behind or just adjacent to the subject. Critically, you are editing only what is inside this new mask (or you can invert the mask to edit everything outside it, for a standard vignette).
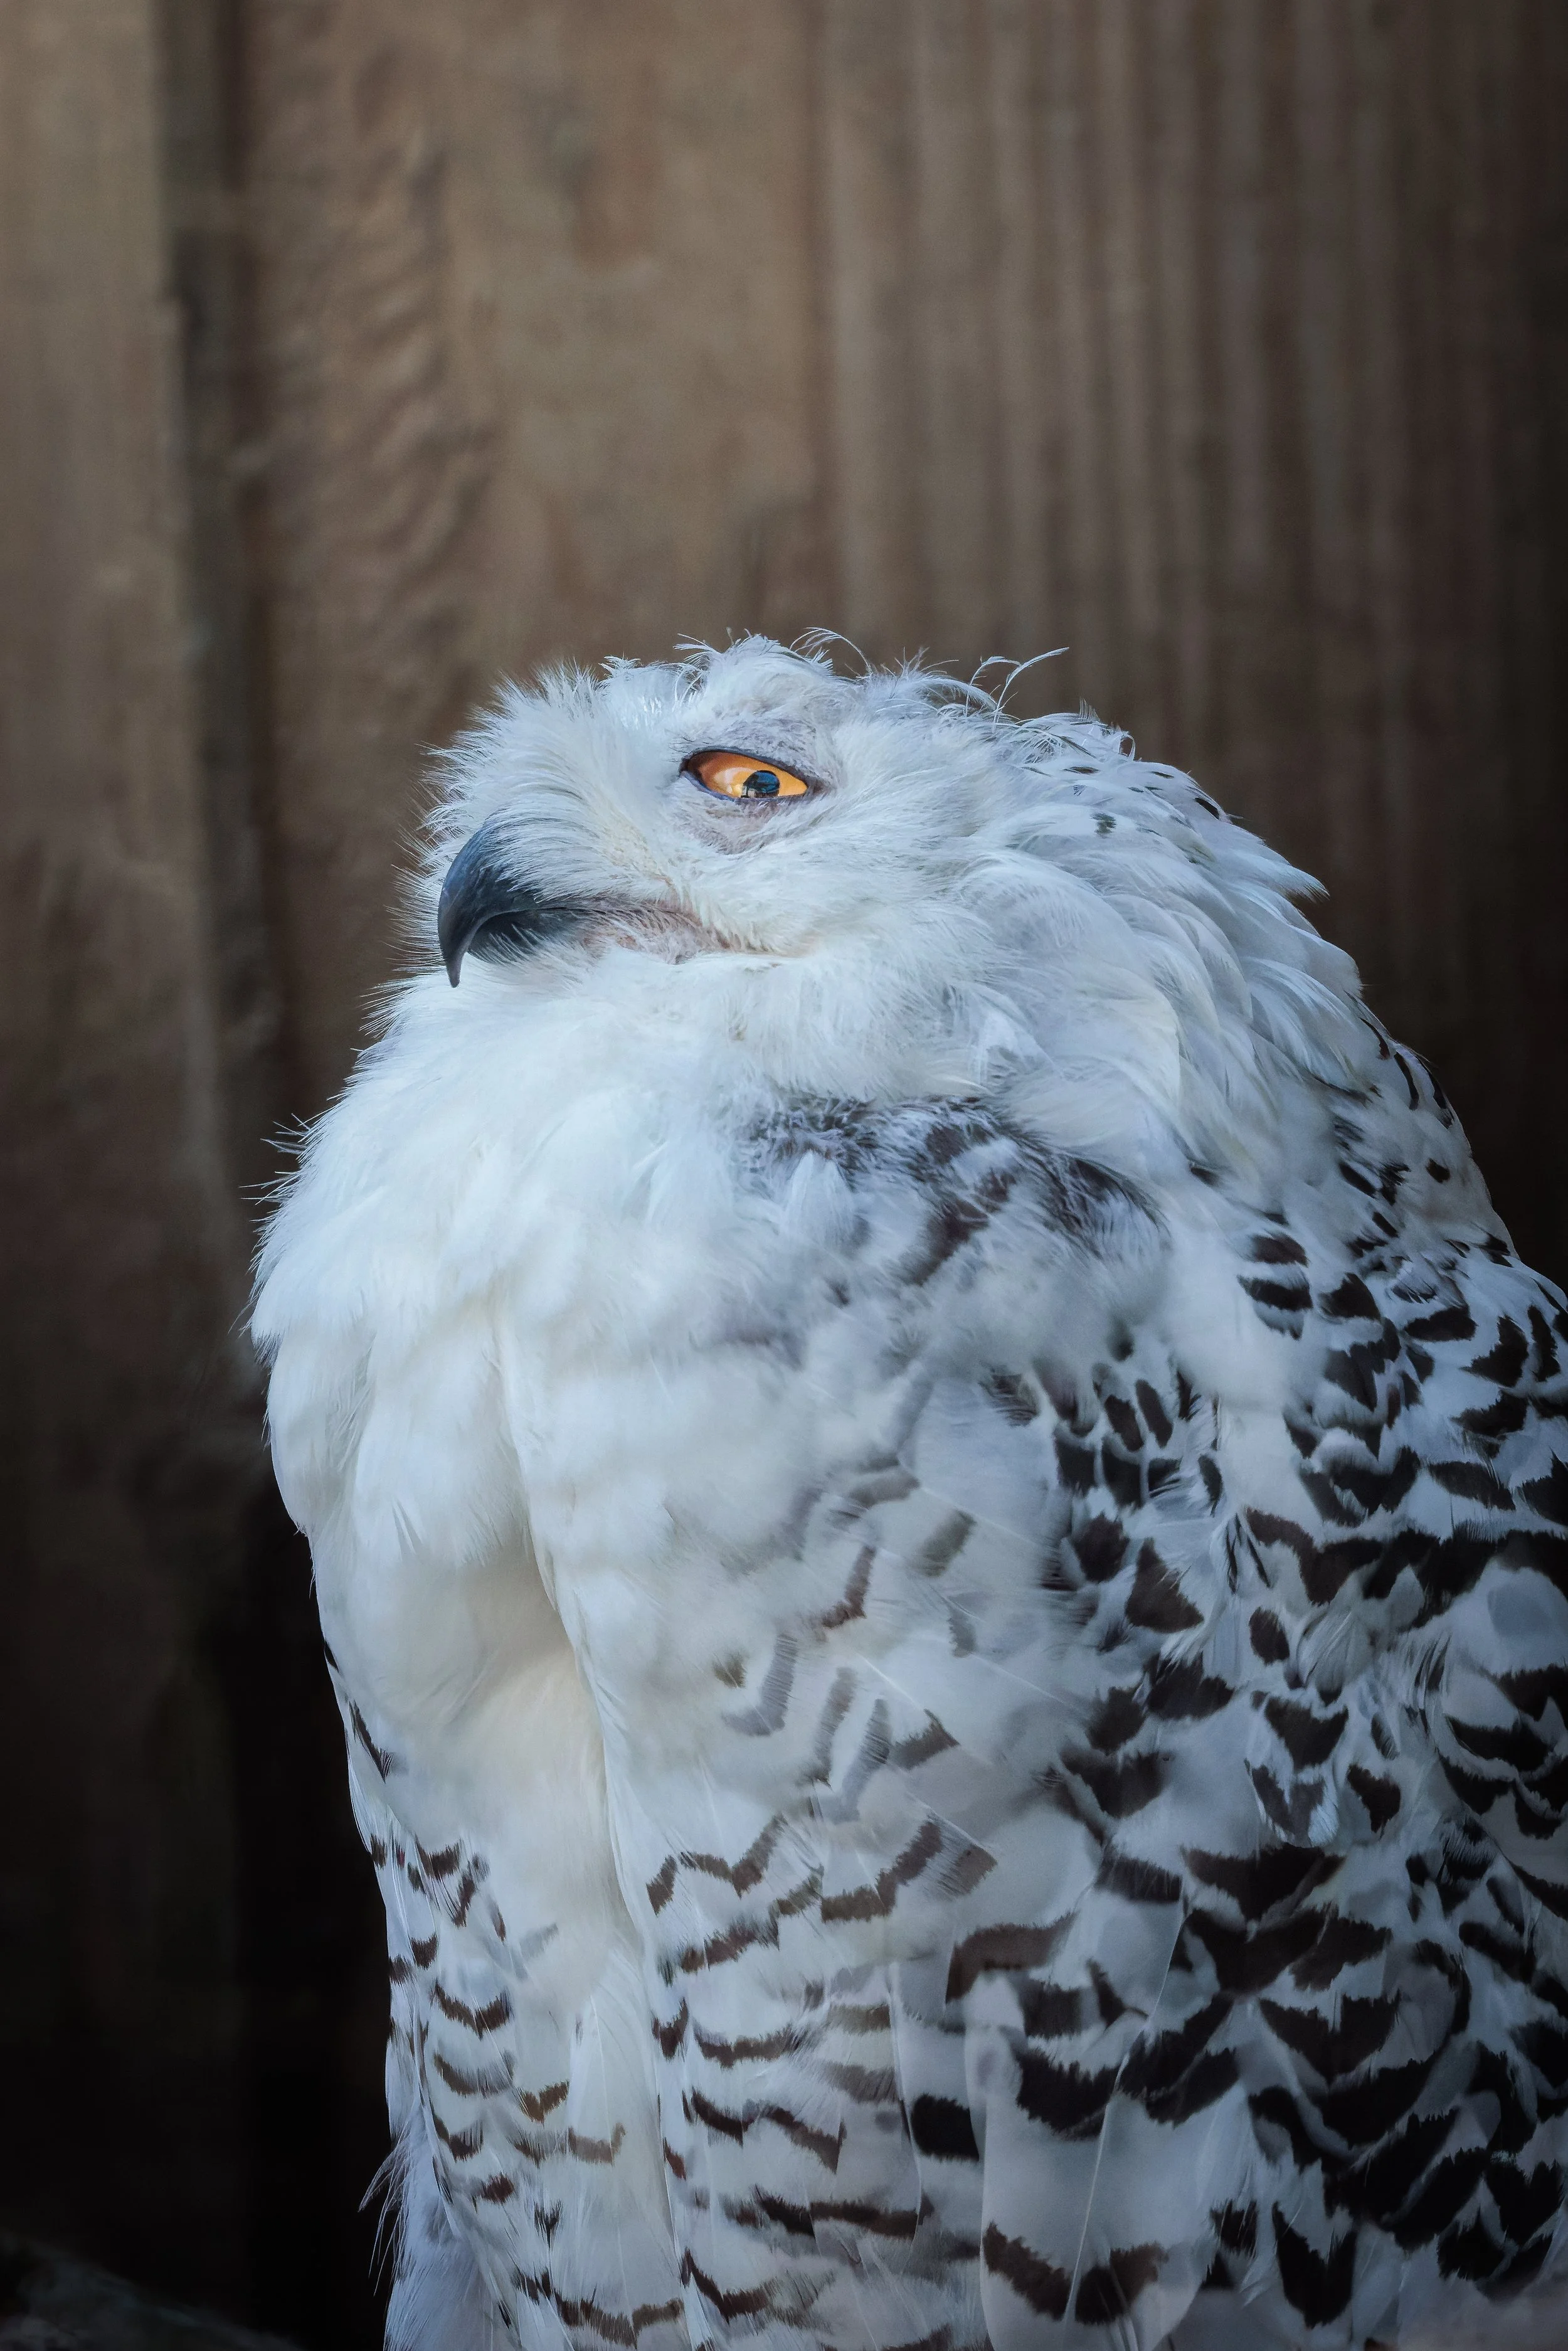
The Glow Settings: To build the glow, drastically raise the Exposure within the gradient. For added "pop," you can increase the Contrast or pull the Whites up. You can even combine this with some negative dehaze and increasing of the blacks for a soft glow. Positioned strategically, this effect creates a dramatic, contrasty light halo. This creates a powerful layer of contrast that pushes the subject forward against the previously darkened background. In the provided example, this glow effectively spotlights the side of the owl, adding a cinematic depth that makes it impossible to ignore.
By combining these three masking strategies—background isolation, subject micro-contrast, and strategic peripheral glowing—you gain complete control over the narrative of your image, ensuring your subject is always the hero.
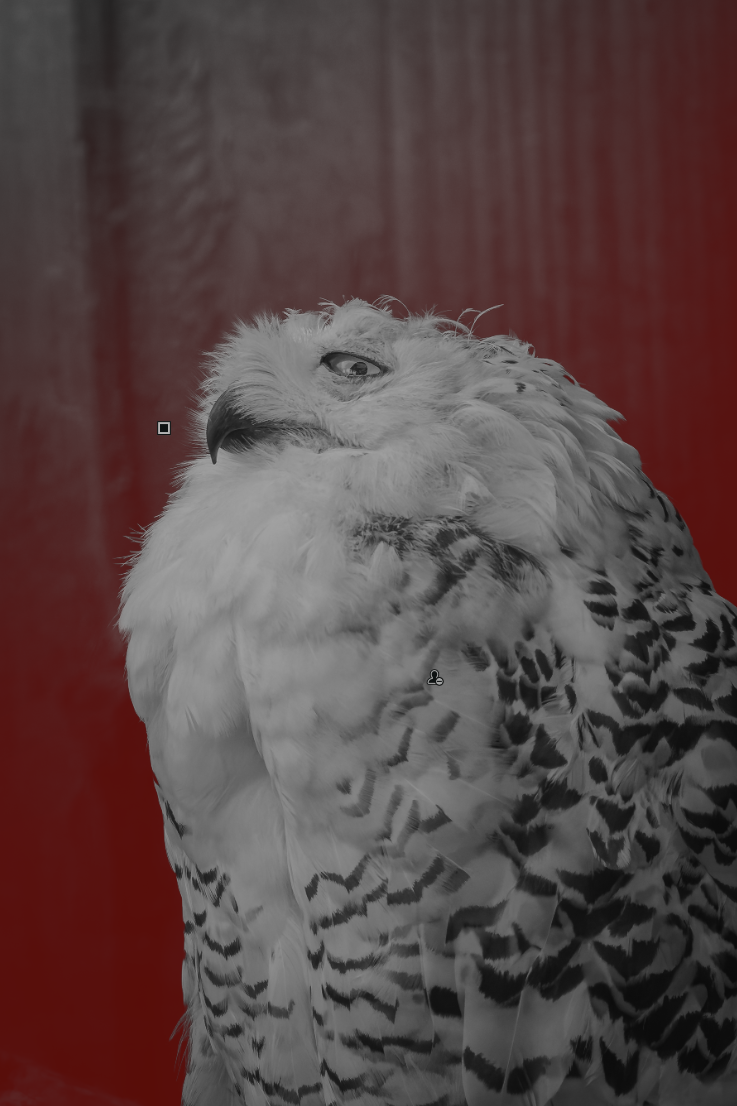
Select the background using the background select tool, or a linear gradient with the subject removed. Then apply some negative exposure, reduce highlights and saturation to taste!
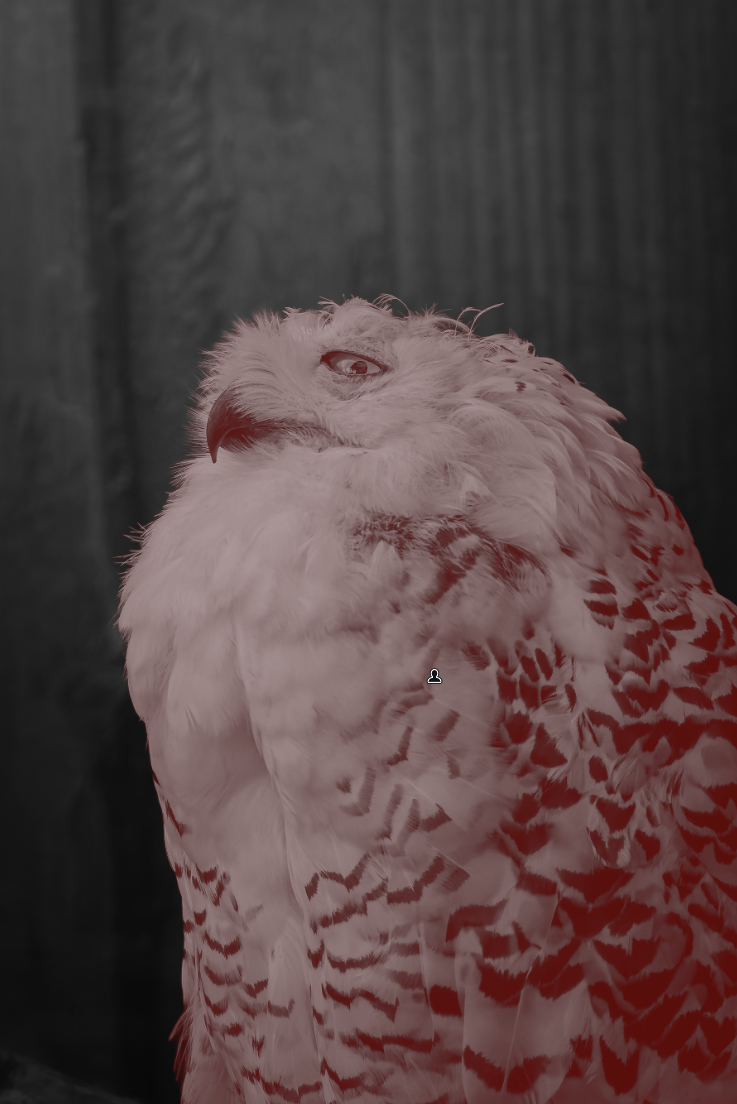
Use a subject mask to isolate your subject, then add small amounts of texture, clarity and a bump of exposure to add that pop against your newly muted background.
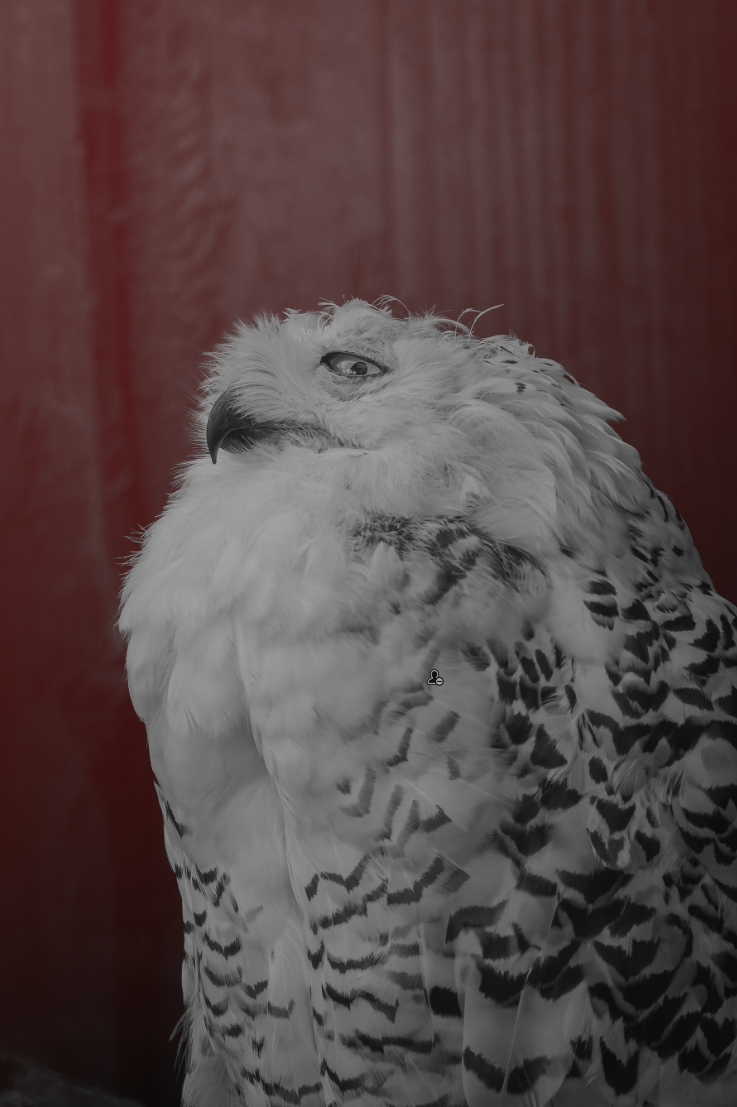
Pay attention to your natural light source to spot where to position your “glow” effect. Use a radial gradient mask, then add some gentle exposure and play with the blacks/whites and negative dehaze.